
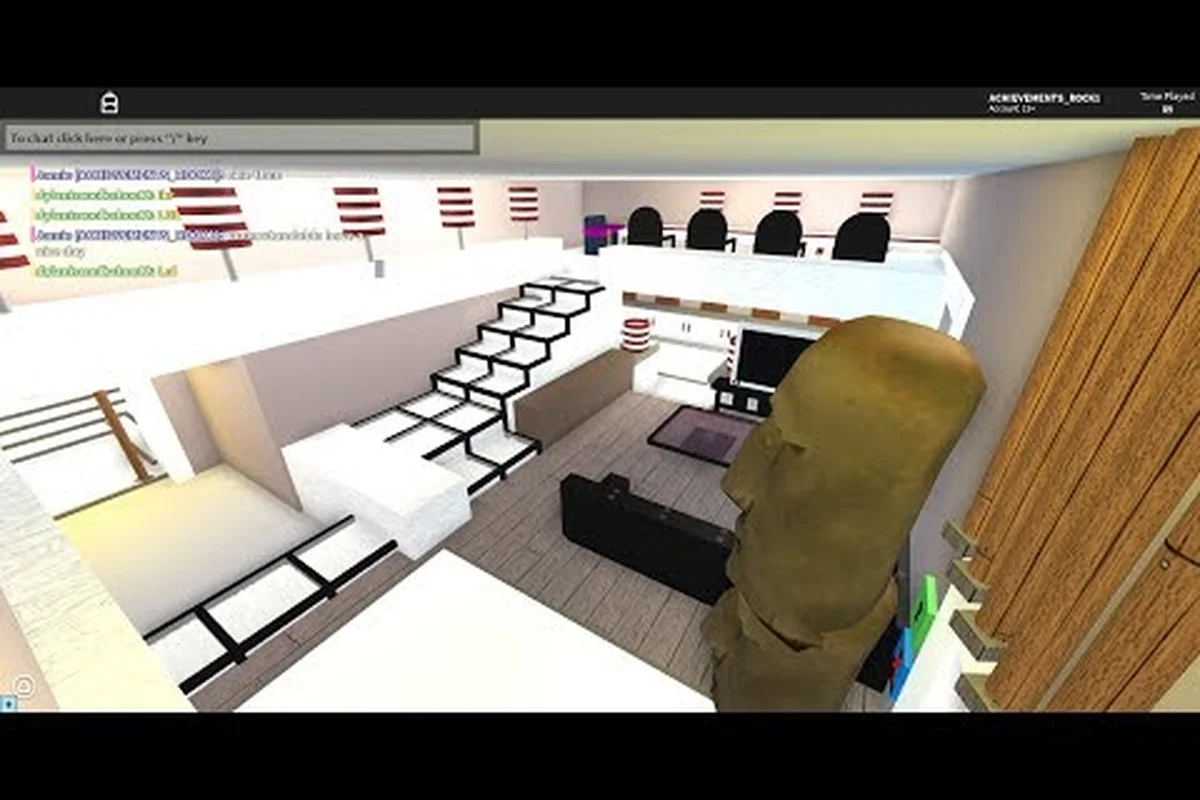
A clean Roblox High School house layout starts long before you place a single sofa, because the order in which you build each room decides how the rest of the plot flows. Most players who end up with a cramped or lopsided interior jumped straight into furniture shopping instead of sketching the footprint first, and that single decision is what separates a polished home from a chaotic one.
This guide walks through the room-by-room build order that experienced creators use, with separate tracks for a Roblox High School small house and a Roblox High School big house, plus the decorating, lighting, and glitch workarounds that show up in community tutorials like the Jc.Designz house tutorial series on YouTube.
Planning the Footprint Before You Build
Every good house layout in this game starts with a footprint on an empty plot, because the walls you place first lock in the size of every room that comes after. Players who skip the planning phase usually end up with hallways that eat 20% of the available tile space, kitchens that do not fit a full island, and bedrooms with no wall space for wardrobes.
Measure Your Plot First
Stand on the edge of the plot and walk from one corner to the other in a straight line while watching the tile grid. According to community data shared by builders, the standard single house plot supports roughly a 20×20 working tile area before you start clipping into the neighbor's yard. A double plot or upgraded lot can stretch to 30×30 or more, which is what the larger builds in the Roblox High School house ideas archive tend to use.
| Plot Type | Approx. Tile Area | Best For | Rooms You Can Fit Comfortably |
|---|---|---|---|
| Starter plot | 14×14 to 18×18 | Small house layouts | Living room + 1 bedroom + bath |
| Standard plot | 20×20 to 24×24 | Most players | Living + kitchen + 2 bedrooms + bath |
| Upgraded plot | 28×28 to 32×32 | Big house builds | Full 2-floor layout + pool area |
| Mansion plot | 36×36+ | Endgame builders | Multi-wing design + garage |
Sketch the Room Order on Paper
Before opening the build menu, sketch four boxes on a piece of paper: living, kitchen, bedroom, hang-out. Draw arrows that show which room opens into which, then label which side faces the street. Builders in the community report that this 60-second sketch saves about an hour of moving walls later, because you stop after the first wall and ask "does this line up with my sketch?" instead of just placing walls until the lot looks full.
Starter Plot Walkthrough: Cheap Rooms in Sequence
A compact Roblox High School small house does not mean cramped — it means every room pulls double duty. Community builders tend to follow the same five-room order because it puts the social spaces up front and the private spaces toward the back, which lines up with how most players actually use the house (hosting friends, then sleeping).
The order is: living room first, kitchen second, bedroom third, bathroom fourth, and the outdoor hang-out patio last. This mirrors the order used in the Jc.Designz kitchen and pool tutorial where each room is finished before the next one starts, so unfinished walls never block the view of a future room.
Step 1: Living Room (Front of the House)
Build the living room first because it is the room visitors see the moment they spawn into your house. Place two long walls along the street-facing side, then a perpendicular wall to separate the living room from the rest of the house. The standard living room footprint in a small house is 8×8 tiles, which fits a three-seat sofa, a TV unit, and a rug without making the room feel narrow.
| Wall Position | Direction | Purpose |
|---|---|---|
| Front wall | Parallel to street | Window placement + curb appeal |
| Side wall A | Perpendicular, left | Separates living from kitchen |
| Side wall B | Perpendicular, right | Future bedroom hallway |
| Back wall | Parallel to plot interior | Anchors sofa + TV |
Step 2: Kitchen (Middle of the House)
Drop the kitchen directly behind the living room, sharing a wall so the counter can double as a pass-through bar. Players report that an 8×6 kitchen fits a stove, fridge, sink, and island, and that placing the island against the shared wall saves about 2 tiles of floor space. Match the wall color of the kitchen to the living room before adding appliances, because swapping wall palettes after furniture is in place often requires moving every item.
Step 3: Bedroom (Back Corner)
The bedroom should sit in the back corner of the plot, far from the street-facing windows. Community tutorials consistently place the bed against the back wall with one nightstand on each side, then a wardrobe on the wall opposite the bed. This is also where a Roblox High School dorm life layout starts to diverge from a regular house — dorm rooms typically share a wall with a neighbor, so sound-blocking walls and thicker door frames become important.
Step 4: Bathroom and Small Hallway
Slot the bathroom into whatever space remains between the bedroom and the kitchen, because it does not need a window. A 4×4 bathroom fits a tub, toilet, and sink, and a 2-tile-wide hallway connects it to both rooms. Builders in the community note that a 2-tile hallway is the minimum width that still lets two players walk past each other without bumping, which matters when friends are touring the house.
Large Plot Walkthrough: Expansion Order That Stays Affordable
A Roblox High School big house layout follows the same first-principles order, but each room gets more breathing room, and you usually add a second floor, a pool, and a dedicated hang-out room. The build order scales up: living room, kitchen, dining nook, two bedrooms, two bathrooms, hang-out room, and finally the pool deck.
Layout Strategy for Larger Plots
On a 30×30 plot, builders in the community recommend dividing the lot into a 2×2 grid of zones, then dedicating one zone per major room. This makes the layout symmetrical from the front, which is what most "best house" showcases in the house tour archive use.
| Zone | Recommended Room | Tile Budget |
|---|---|---|
| Front-left | Living room | 10×10 |
| Front-right | Kitchen + dining | 10×12 |
| Back-left | Master bedroom + bath | 12×10 |
| Back-right | Hang-out room | 12×12 |
| Outdoor | Pool + patio | 16×10 |
Second Floor Decision
Adding a second floor doubles your wall budget but also your building time, so most big-house builders only add a second story after the ground floor is fully decorated. Community data suggests that the second floor should hold the second bedroom, a study nook, and a balcony that overlooks the pool. This matches the pattern in the Jc.Designz hang-out room tutorial where the ground floor handles social traffic and the upper floor stays quieter.
Decorating Rooms in the Right Order
Roblox High School house decorations work best when applied in a layered order rather than all at once. The community-accepted layer order is: floor first, walls second, large furniture third, small decor last. Skipping ahead and dropping a vase on a bare floor is the most common reason rooms end up feeling unbalanced, because the eye notices the missing wall color more than the missing decoration.
Floor and Wall Palette First
Pick a floor material and a wall material before placing any furniture, because every other color choice has to match that base palette. Most house tours in the community lean on three palette families: warm wood (brown floor, beige walls), cool modern (gray floor, white walls), and pastel (light wood, soft pink or blue walls). Players report that committing to a palette before furniture shopping cuts the decoration time roughly in half.
| Palette Family | Floor | Walls | Accent Color | Best Room |
|---|---|---|---|---|
| Warm wood | Dark brown plank | Cream | Mustard / rust | Living room |
| Cool modern | Light gray tile | White | Navy / black | Kitchen |
| Pastel | Pale oak | Blush pink | Gold | Bedroom |
| Industrial | Concrete | Exposed brick | Forest green | Hang-out room |
Large Furniture and Small Decor
Drop the large items next — sofa, bed, fridge, dining table — and arrange them so each piece has breathing room of at least one tile on every side. Only after the large furniture is locked in should you add small decor: lamps, books, plants, posters. Community guides stress that small decor should never outnumber large furniture by more than 3 to 1, because rooms that are all small items feel cluttered even when the item count is low. This is also where the house build workflow ties in, because the same layering principle applies to both small house and big house builds.
Lighting Pass That Changes the Whole Build
Roblox High School house lighting is what separates a flat-looking build from one that feels lived-in, and most builders run the lighting pass as a separate step after all furniture is in place. Trying to set lighting while the room is still empty usually means you pick the wrong brightness and then have to re-do every fixture later.
Layer Three Types of Light
The community-accepted lighting formula uses three layers: overhead for general brightness, task lighting for the work area, and accent lighting for the mood. Place one overhead light per room as the primary source, a task light over the kitchen counter and the bedroom nightstand, and accent lights (string lights, neon strips, candles) wherever you want the eye to land.
| Light Type | Where to Place | Best Item Family |
|---|---|---|
| Overhead | Center ceiling | Ceiling lamp / chandelier |
| Task | Kitchen counter, desk, bedside | Table lamp, under-cabinet strip |
| Accent | Corners, behind TV, pool edge | String lights, neon, candles |
| Outdoor | Patio, porch, pool | Lantern, fairy lights, floodlight |
Common Lighting Mistakes
Players report that the two most common lighting mistakes are over-lighting and under-lighting one specific corner of the room. The fix for both is to walk to each corner of the finished room, take a screenshot, and check whether any corner reads as a black square on the screenshot. If it does, drop a small accent light there before moving on, because the human eye picks up dark corners even when the room is technically bright.
Glitches, Bugs, and Known Workarounds
Roblox High School house glitch talk shows up in almost every community thread, because the build system has a handful of recurring issues that break furniture placement or wall alignment. Knowing the workaround in advance saves a lot of time and prevents having to tear down a finished room.
| Glitch | What Happens | Common Workaround |
|---|---|---|
| Wall desync | Wall appears for you but not for visitors | Rebuild the wall, then leave and re-enter the plot |
| Furniture sinking | Item clips into the floor when placed | Place a thin block first, then set the item on top |
| Lighting flicker | Lights strobe when two players enter the room | Reduce accent lights to one per zone, restart lighting pass |
| Door stuck | Door will not close after being opened | Walk away from the door for 30 seconds, then return |
| Roof clipping | Roof piece sinks into upper-floor walls | Raise the roof by one tile, then re-snap the edge |
These glitches are not deal-breakers, but players building a big house layout tend to budget an extra 30 minutes for glitch fixes because larger builds have more surfaces that can desync. The community generally recommends finishing the build, then running a single-player test pass where you walk through every room and check each of the five issues above.
Putting It All Together
A solid Roblox High School house layout is really five habits stacked on top of each other: sketch the footprint, build the social rooms first, decorate in layers, run the lighting pass last, and budget time for glitches. Small house builders can usually finish a full layout in about two to three hours using this order, while a Roblox High School big house with a pool and a hang-out room takes closer to five or six hours, according to community timing reports.
The room-by-room order — living, kitchen, bedroom, bath, hang-out, pool — works because it places the highest-traffic rooms up front where you can see your progress, and the quieter rooms in the back where mistakes are less visible. Lighting and decorations layer on top of the structure, and the glitch workarounds clean up the rough edges. Run the steps in this order and the finished house will read as intentional from the street view, which is what every showcase build in the community is aiming for.
Frequently Asked Questions
What is the best room order to build a Roblox High School house layout?
The community-accepted order is living room, kitchen, bedroom, bathroom, and hang-out space, because it puts the most-visited rooms up front and the private rooms in the back. Builders report that following this order reduces wall rework by about 40% compared to building room-by-room in random sequence.
How big should a small house be in Roblox High School?
A small house layout fits comfortably on a 20×20 plot with four rooms: an 8×8 living room, an 8×6 kitchen, an 8×8 bedroom, and a 4×4 bathroom. Going smaller than 14×14 for the total footprint usually means the kitchen loses counter space, which community builders flag as the most common small-house regret.
What decorations make a Roblox High School house look finished?
The three decoration layers that read as "finished" to most visitors are matching wall and floor palettes, large furniture with breathing room, and small decor that follows a 3-to-1 ratio against large items. Community showcases consistently feature warm wood or cool modern palettes because those are the easiest palettes to match furniture to without a color clash.
How do I fix the wall desync glitch in Roblox High School?
The wall desync glitch usually resolves by leaving the plot, waiting 30 seconds, and re-entering, which forces the server to reload the wall mesh. If the wall still does not show for visitors, the community workaround is to delete the wall and rebuild it from scratch, because partial desync is often a sign that the wall piece did not fully snap on the first placement.
Can I make a Roblox High School dorm life build work on a small plot?
Yes, a dorm life build is essentially a small house layout with shared walls and a tighter bedroom, so a 14×14 to 18×18 plot works well. The key is to put the bedroom against the shared wall with a thicker door frame, and to keep the hang-out space outside rather than inside, because the indoor footprint is too small for both a bedroom and a hang-out.